Zapier
Overview
Zapier allows you to integrate your application with Documint in just a few clicks.The next few articles will walk you through the steps necessary to set up your integration using Zapier. Below is the workflow (Zap) we will create with Zapier.
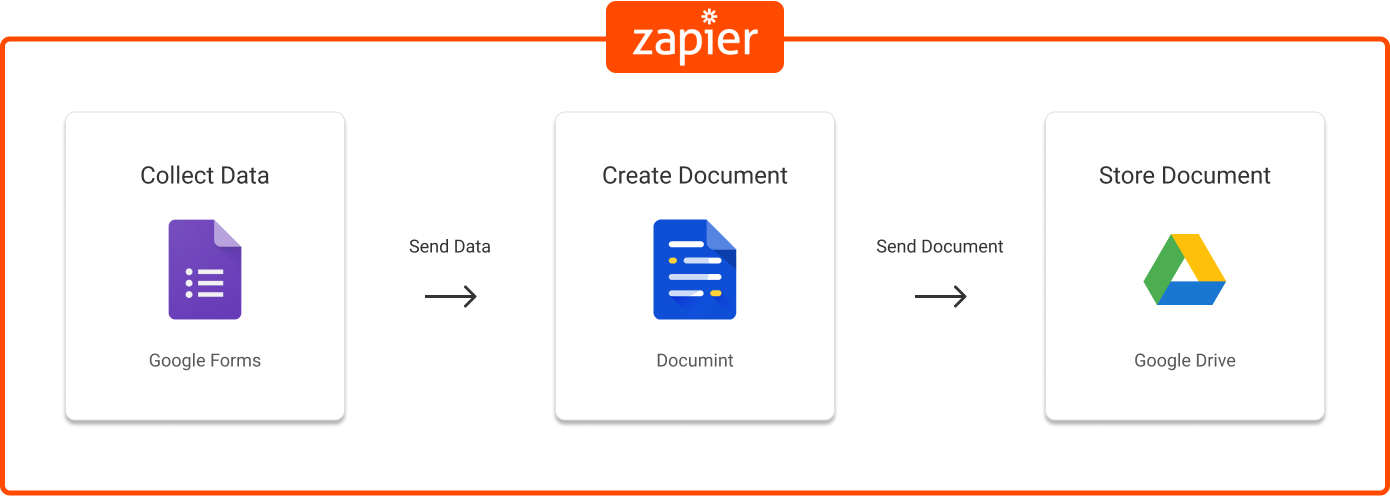
Data Source (Google Forms)
We will use Google Forms as our data source for this example. In your case, you will probably connect to a CRM-like application (ie. Salesforce.com or HubSpot).
Documint Template
This, of course, is what we’ll use to automate our document creation.
Document Storage (Google Drive)
IMPORTANT - The URL link from the Documint step will expire after 24 hours so it's ESSENTIAL that you save the PDF to a storage location like Google drive
We will use Google Drive as our document storage application. In your case, you may want to attach the document with the original record in your application or send it via email.
What is Zapier?
Before we get started it’s important to understand what Zapier is and its role in the process. Zapier describes themselves as being “the glue that connects thousands of web apps.” Zapier allows you to connect your applications, such as Salesforce, HubSpot, MailChimp to thousands of other applications (including Documint) without writing a single line of code!Check out Zapier’s full list of applications to see if your application is supported.
What is a Zap?
Zapier describes a Zap as:
an automated workflow that connects your apps and services together. Each Zap consists of a trigger and one or more actions. When you turn your Zap on, it will run the action steps every time the trigger event occurs.source Zapier DocumentationExit with⌃↩
In other words, a Zap is simply a connection from one application to one or more applications. In our case, we are going to create a Zap that connects Google Forms, Documint, and Google Drive.Our Zap (workflow) will go something like this…
When a new entry is submitted to our Google Form (this is the “trigger” event in Zapier’s terms)
Send the entry data to Documint and merge it with the template we specify (this is an “action” in Zapier’s terms)
Then take the document that was created by Documint and store it in the folder we specified in Google Drive (this is another “action” in our Zap)
Now that we have a template with variables matching the fields in our form we are ready to set up the integration.
Zapier Setup
Requirements
To follow along with this guide you will need the following:
Zapier Account (create free account)
Google Account (create free account)
Documint Template
Here’s what we did to create our template:
Created a new template named “Zapier Demo”
Added 3 Section Elements:
The first section has 2 columns and will contain the person’s name and occupation
The second section also has 2 columns, one with an Image Element and the other with the address variables.
The last section has 1 column with the “Favorite Food” label and favorite_food variable below it.
We added some colors, aligned & resized the text, and voila!
Create Documint Template
Below is an example of our completed template:
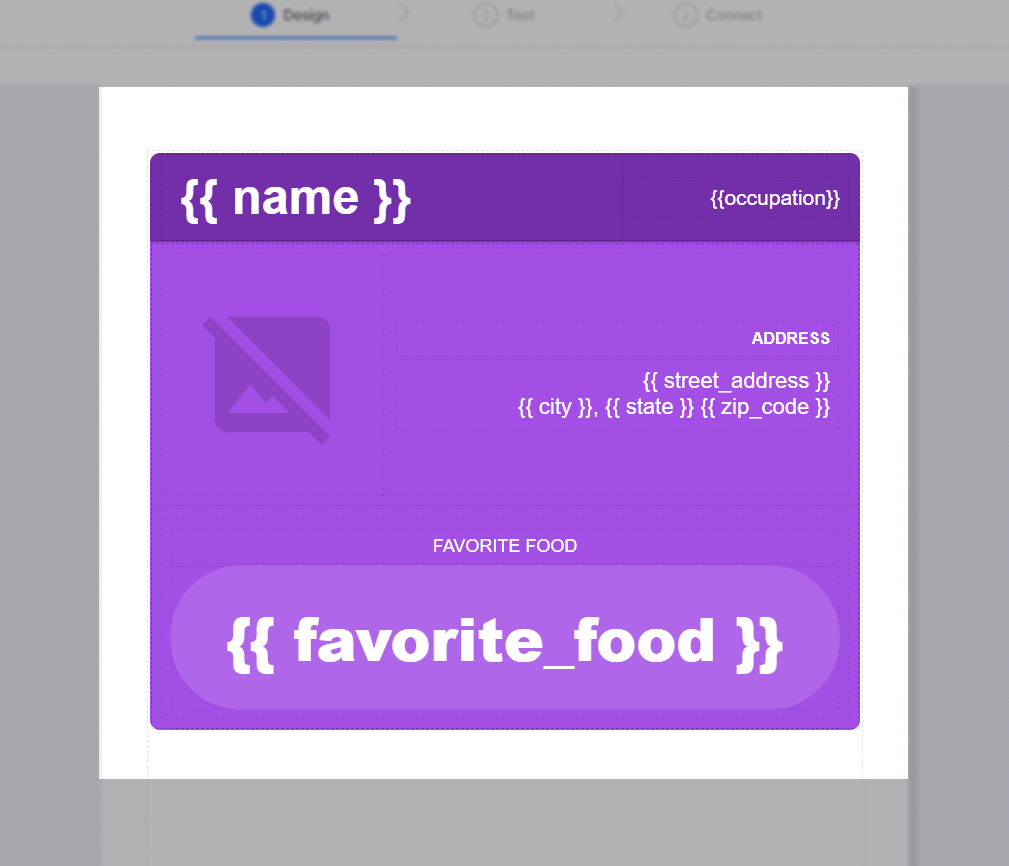
As you can see, we have added a variable to our template for each question in our Google Form.
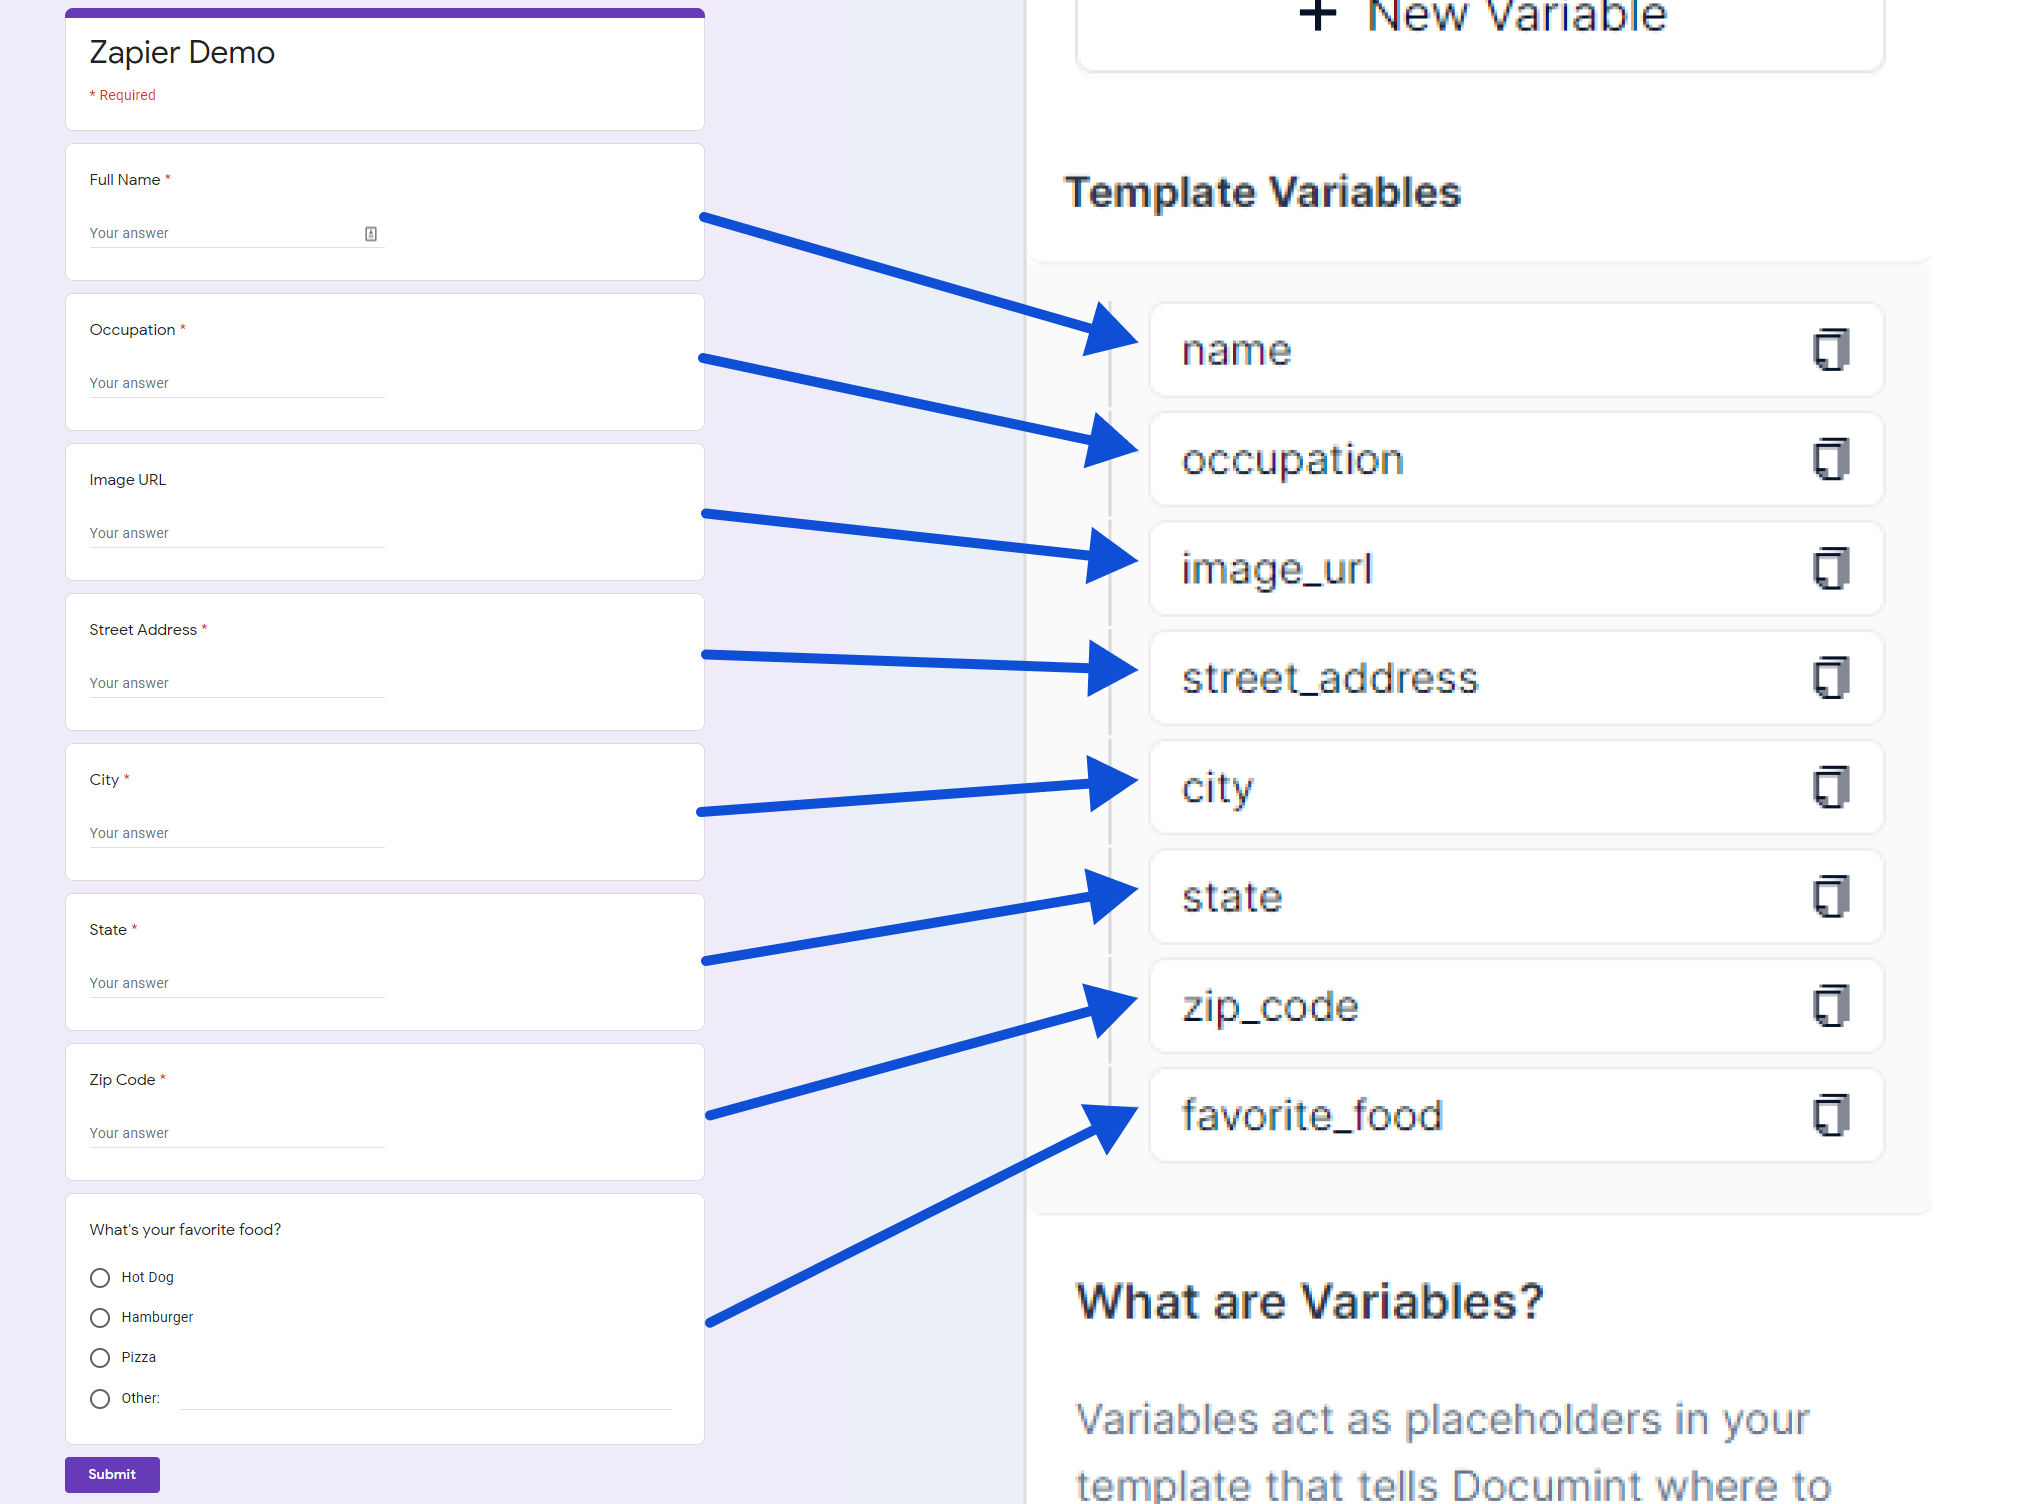
Now that we have a template with variables matching the fields in our form we are ready to set up the integration.
Set up Data Source
To create your form, go to Google Forms then click “Blank” at the top of the page (see below).
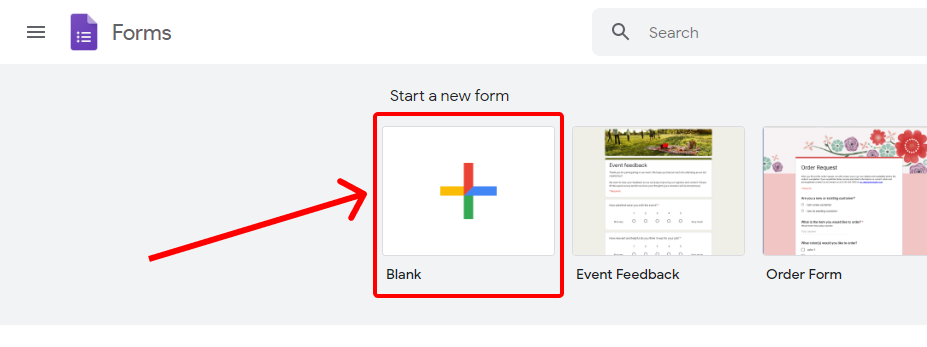
Next, you will need to add the following fields to the form:
Field Name
Field Type
Choices (for multiple choice)
1
Full Name
Short Answer
2
Image URL
Short Answer
3
Occupation
Short Answer
4
Street Address
Short Answer
5
City
Short Answer
6
State
Short Answer
7
Zip Code
Short Answer
8
Favorite Food
Multiple Choice
Hot Dog, Hamburger, Pizza, Other
Once you’ve added all of these fields your form should look something like this:
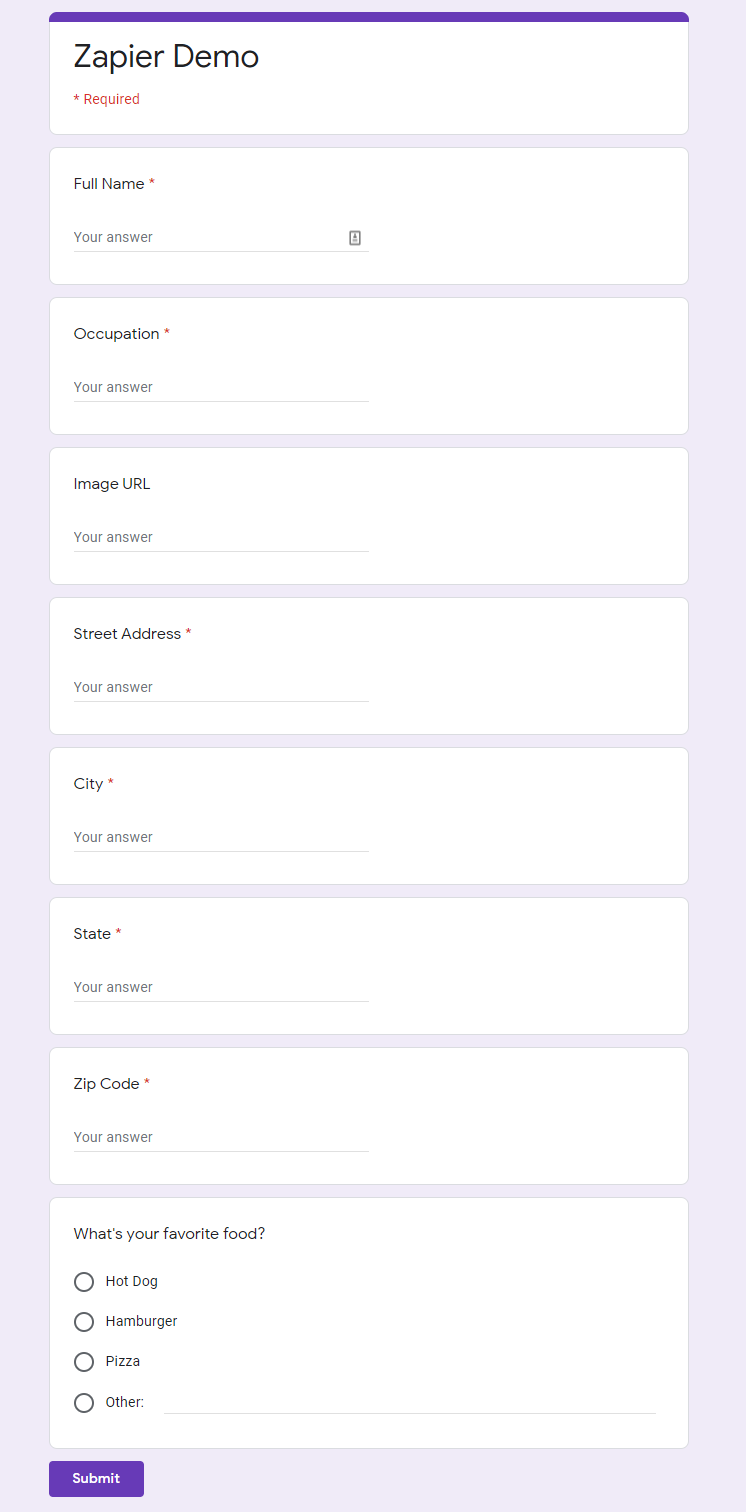
Now it’s time to connect our Google Form with our template.
Click the button below to create a new zap in Zapier.
Outline
1) Choose the trigger - New form response
2) Choose the first action - Create the document
3) Choose the second action - Store the document
Start here
Choose the trigger: New form response
The trigger is the “event” that will cause the workflow (Zap) to be initiated. In our example, our workflow will be triggered when a new response is added to our Google Form.
Search for “google forms” and select the app
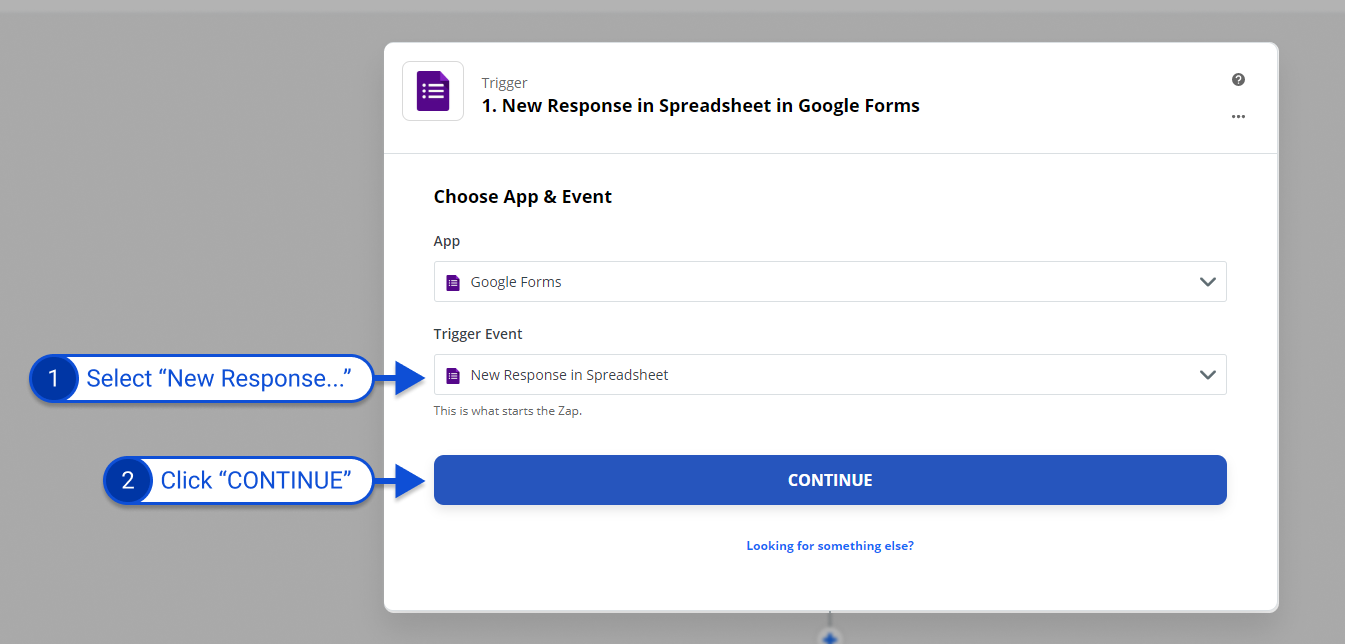
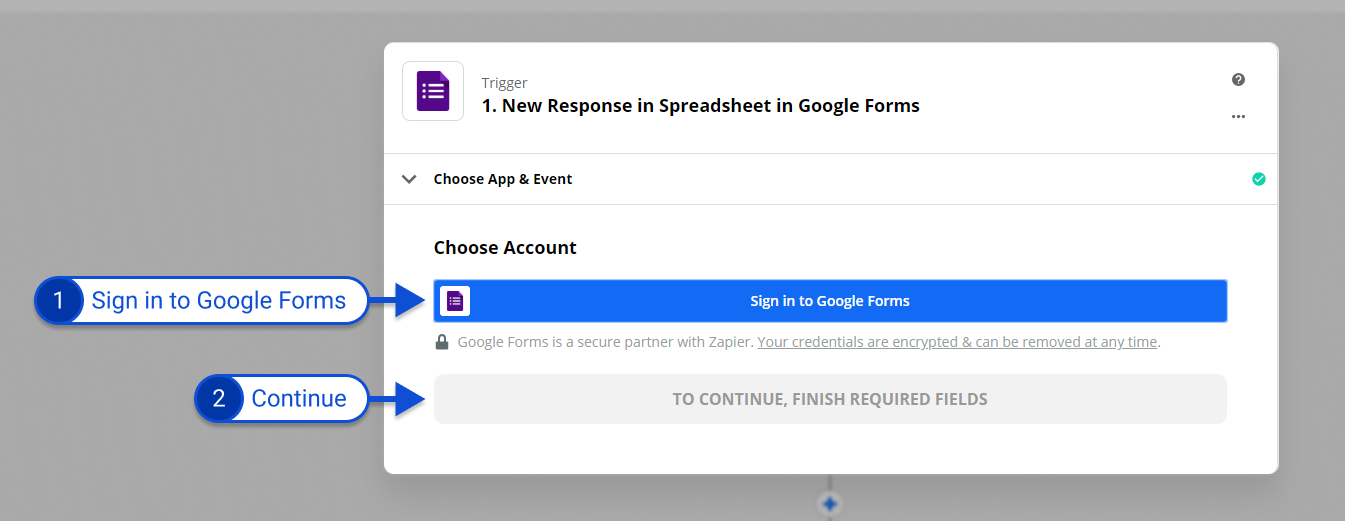
2. Sign in to Google Forms and allow all permissions
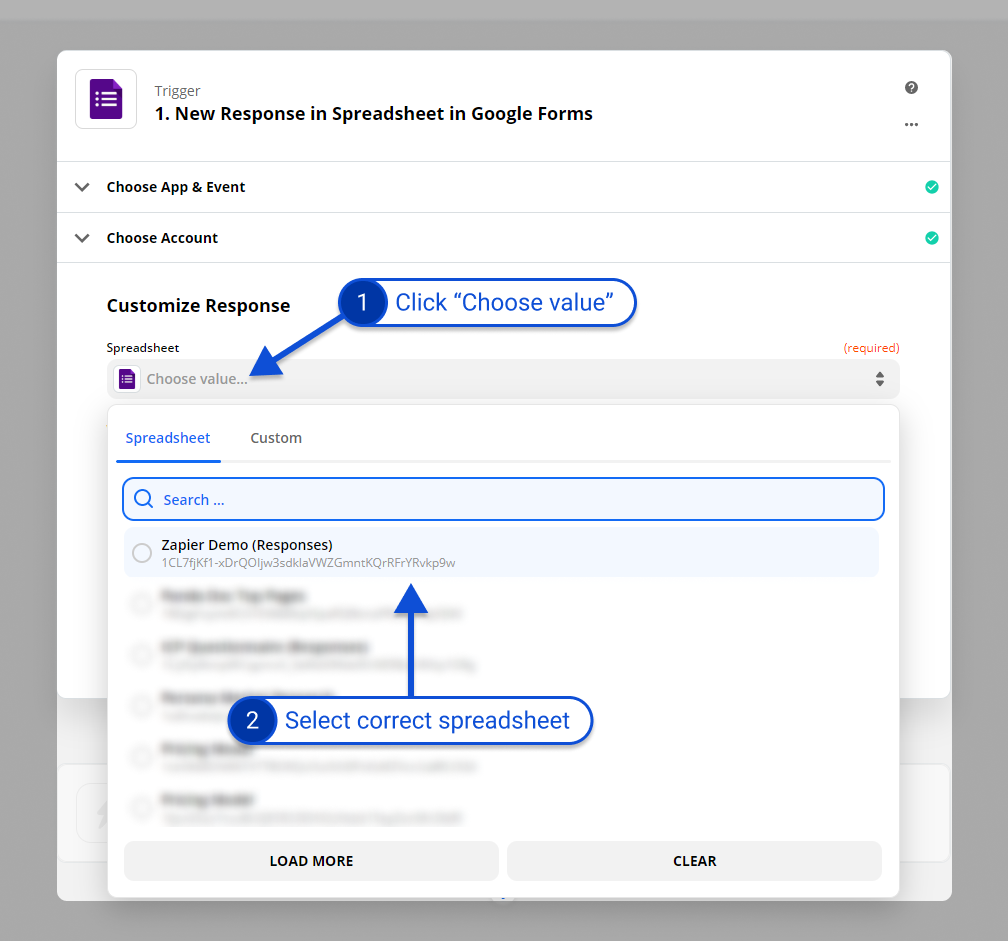
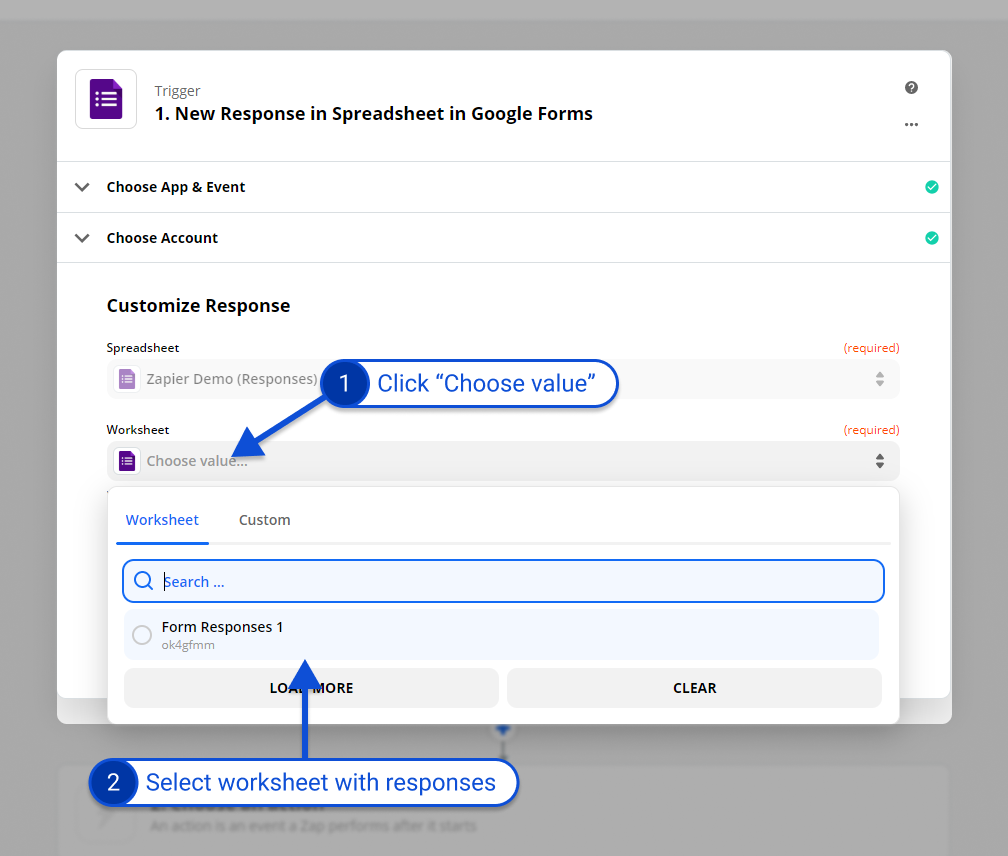
3. Select the spreadsheet created by the Google Form we created earlier
4. Select the worksheet that contains the responses. It’s probably labeled “Form Responses 1”
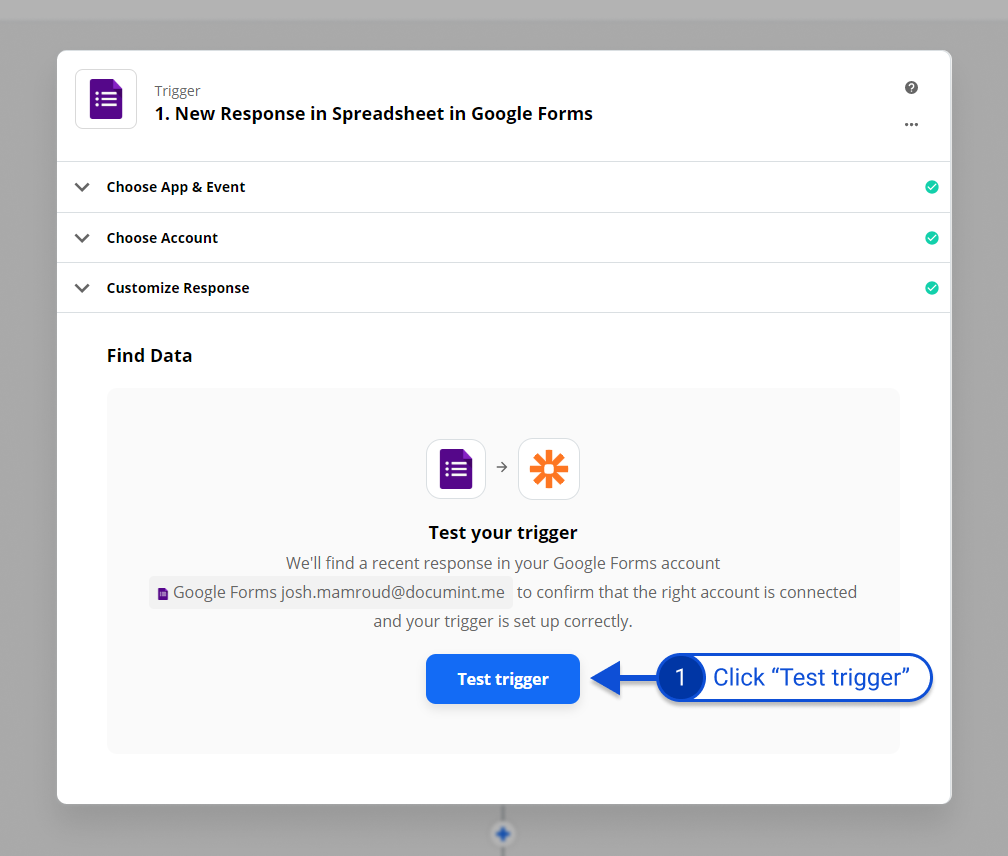
5. Click “Test Trigger”. This will load a couple of responses (if there are any) that you will be able to use later for mapping fields.
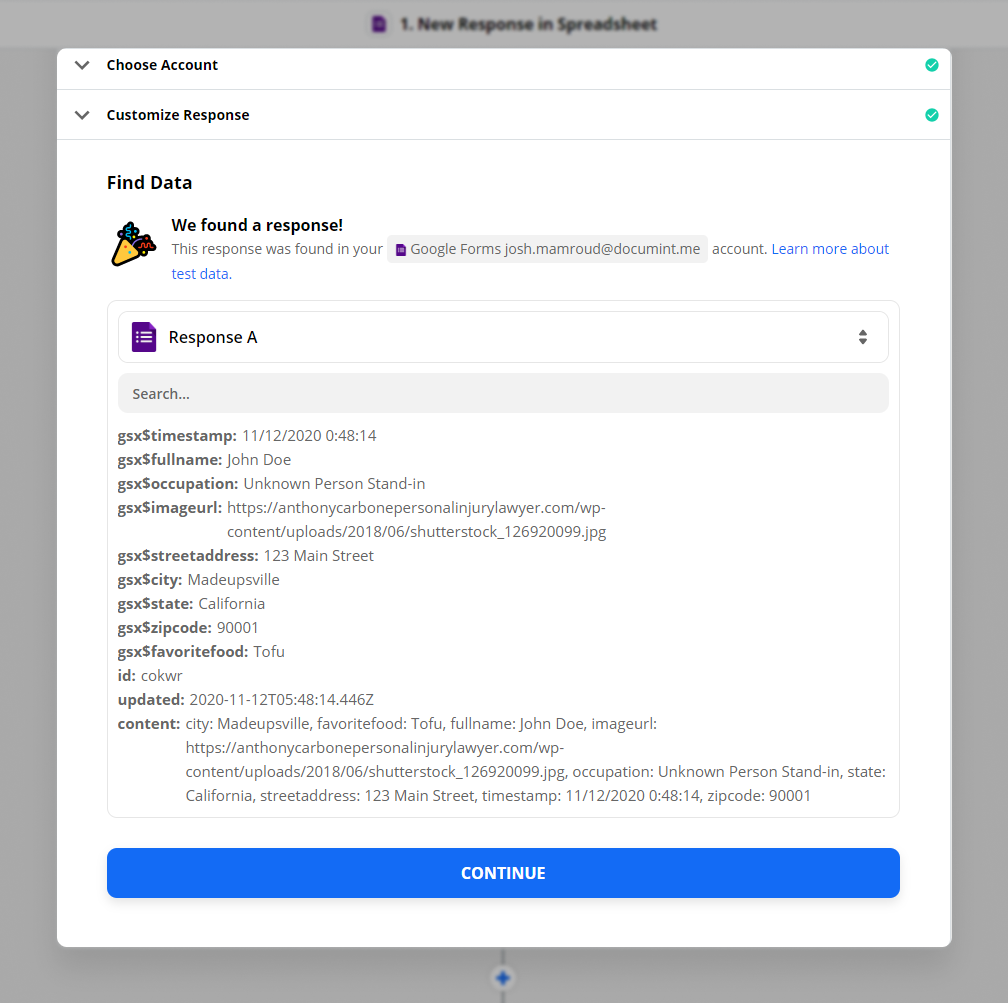
6. Review loaded data and click “Continue”
Choose the first action - Create a document
An action in Zapier is a task to be performed. The first task we will perform will be to create the document in Documint.
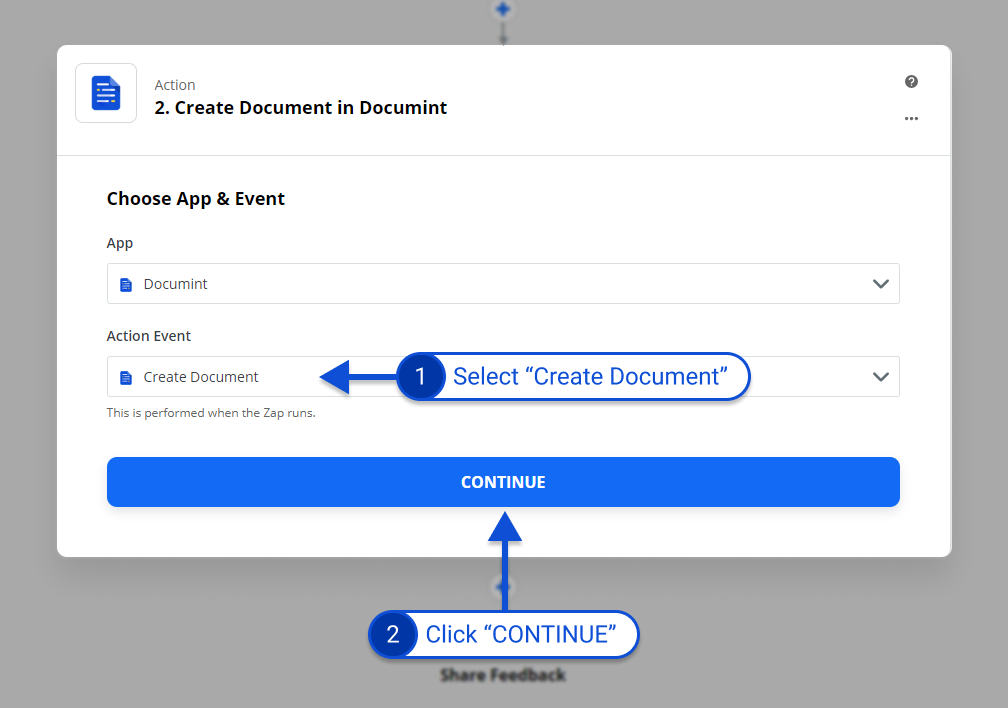
Search for and select “Documint”
Select “Create Document” as the Action Event
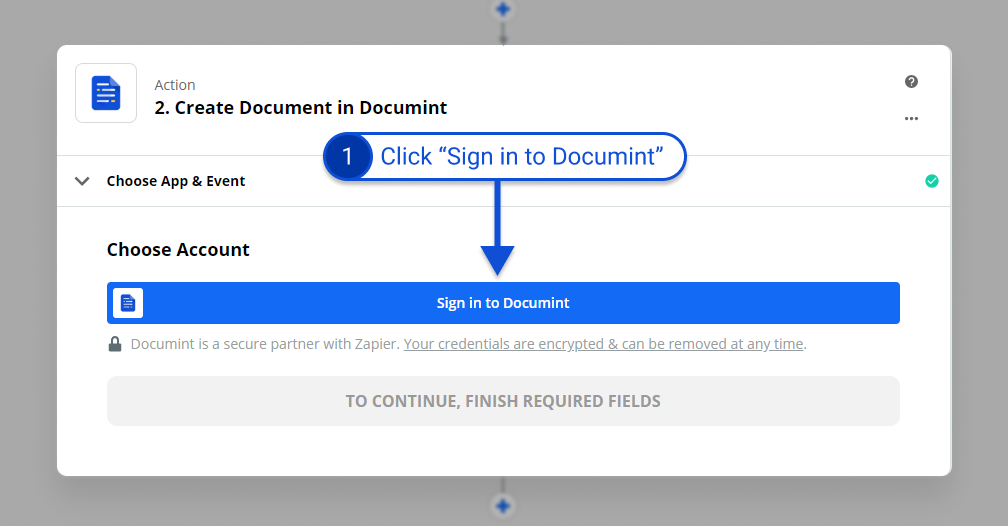
3. If you have not already done so you will need to sign into Documint. Do this by clicking “Sign in to Documint”
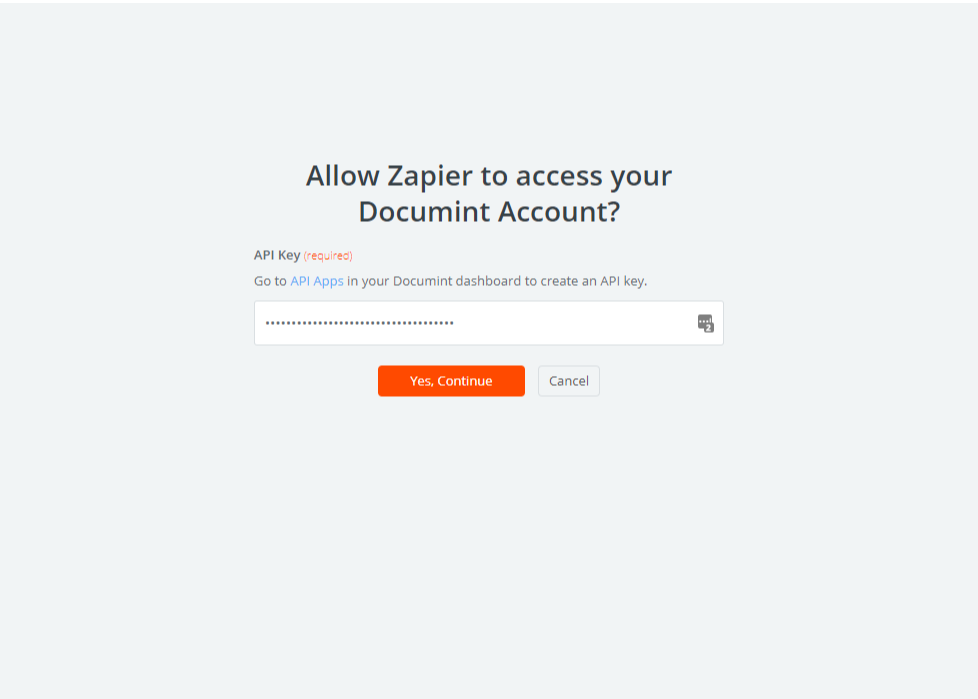
4. A new window will open prompting you to enter your Documint API Key. If you don’t already have one you will need to create a new API Key. Once you have your API Key paste it in the form then click “Yes, Continue”
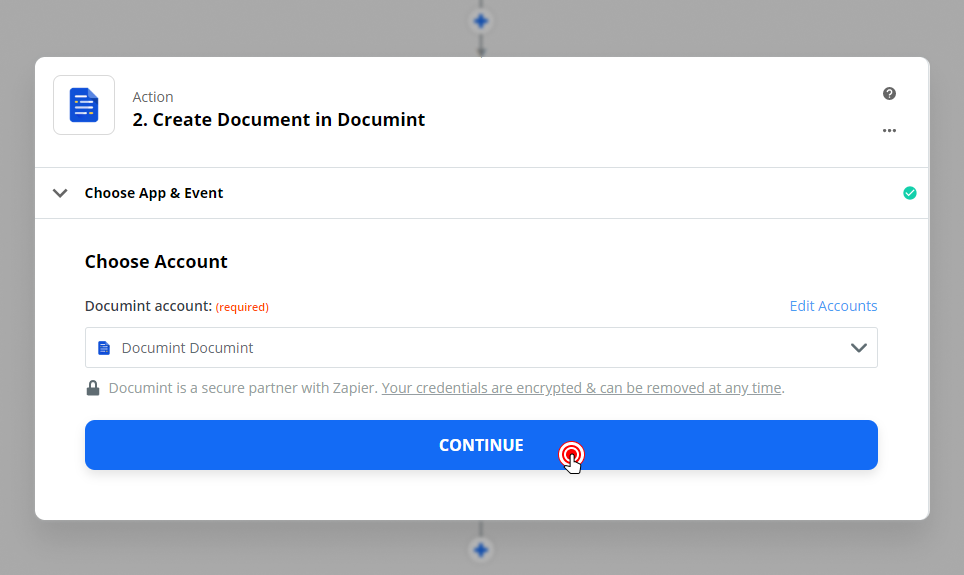
5. Click “Continue”
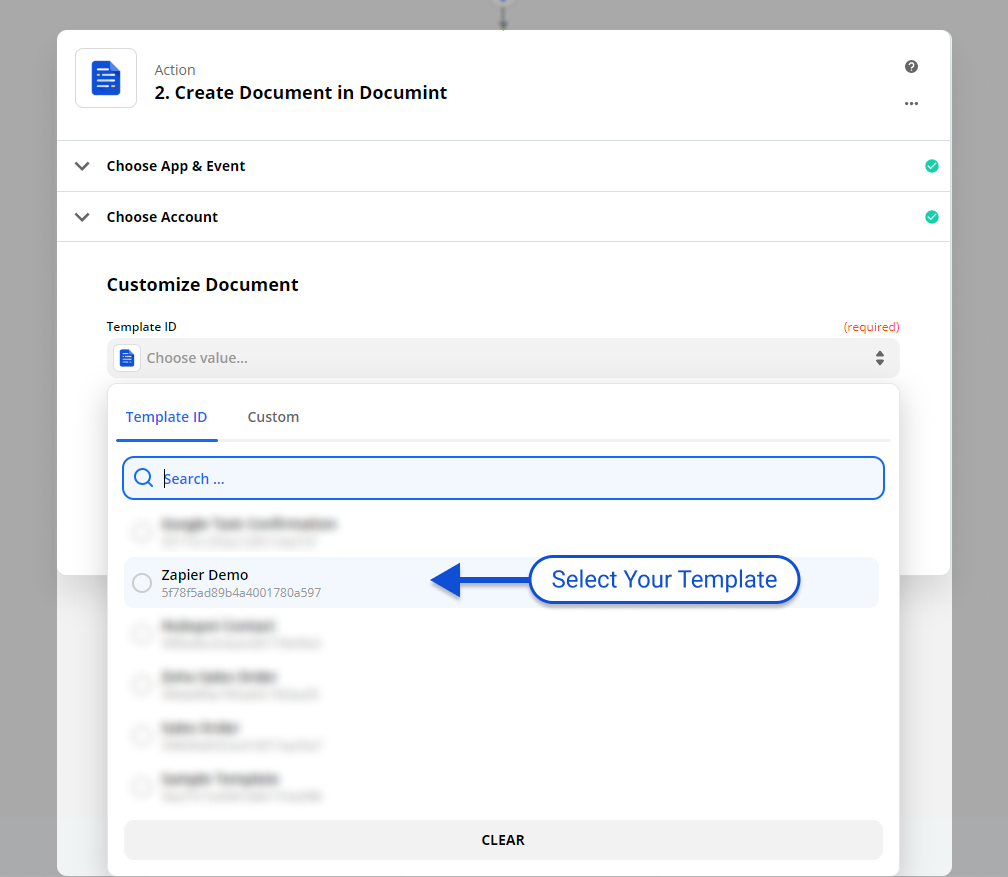
6. Select your template
7. Map the data from the form to each field in the template. For example, in this case we want the “fullname” filed in our form to be merged into the “Name” field in our template.
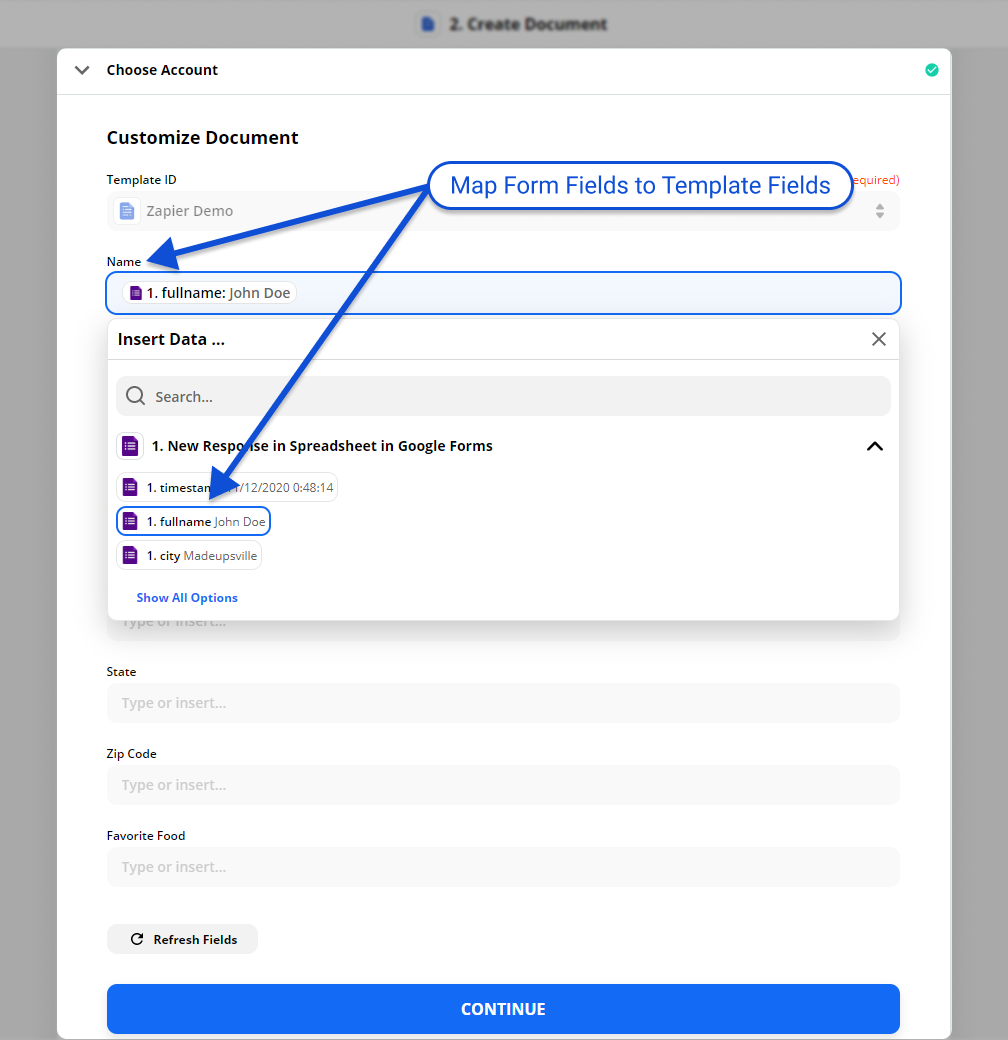
8. Map the rest of the fields then click “CONTINUE”.
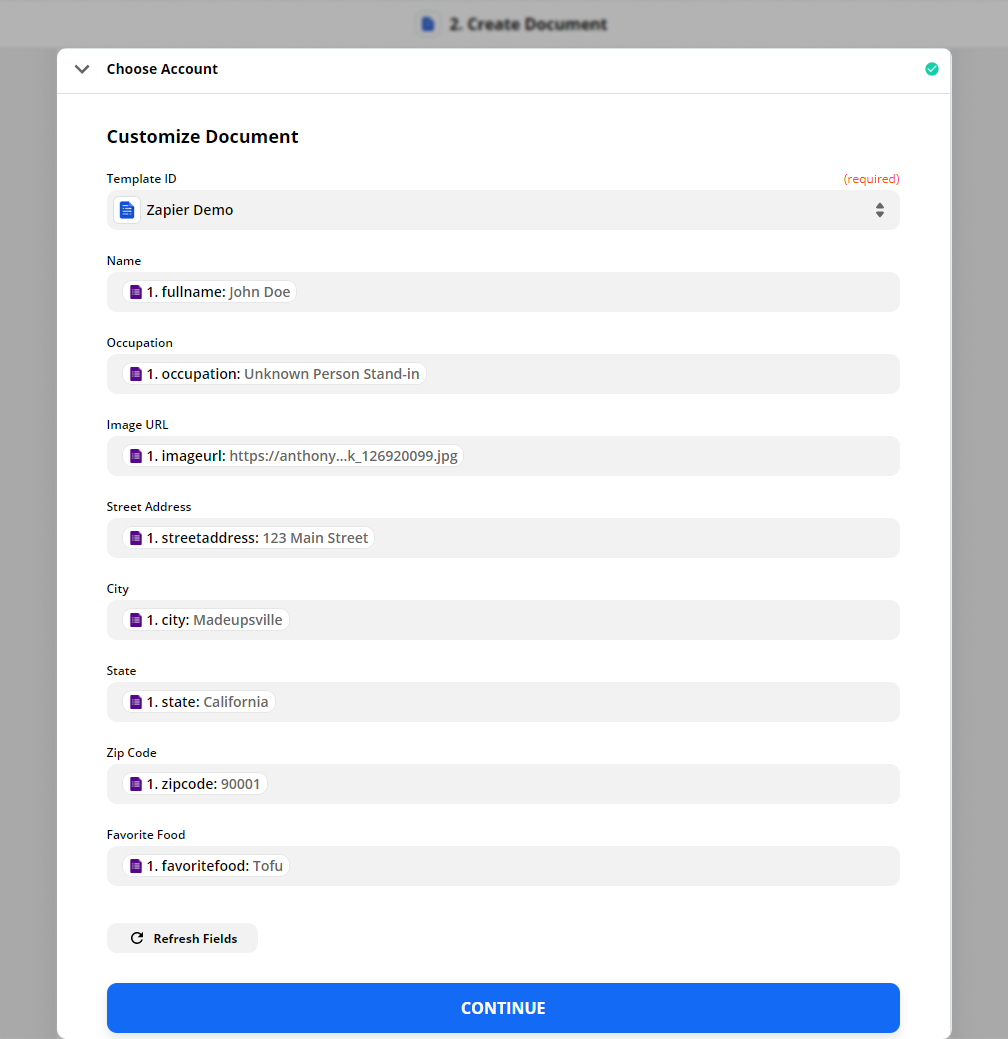
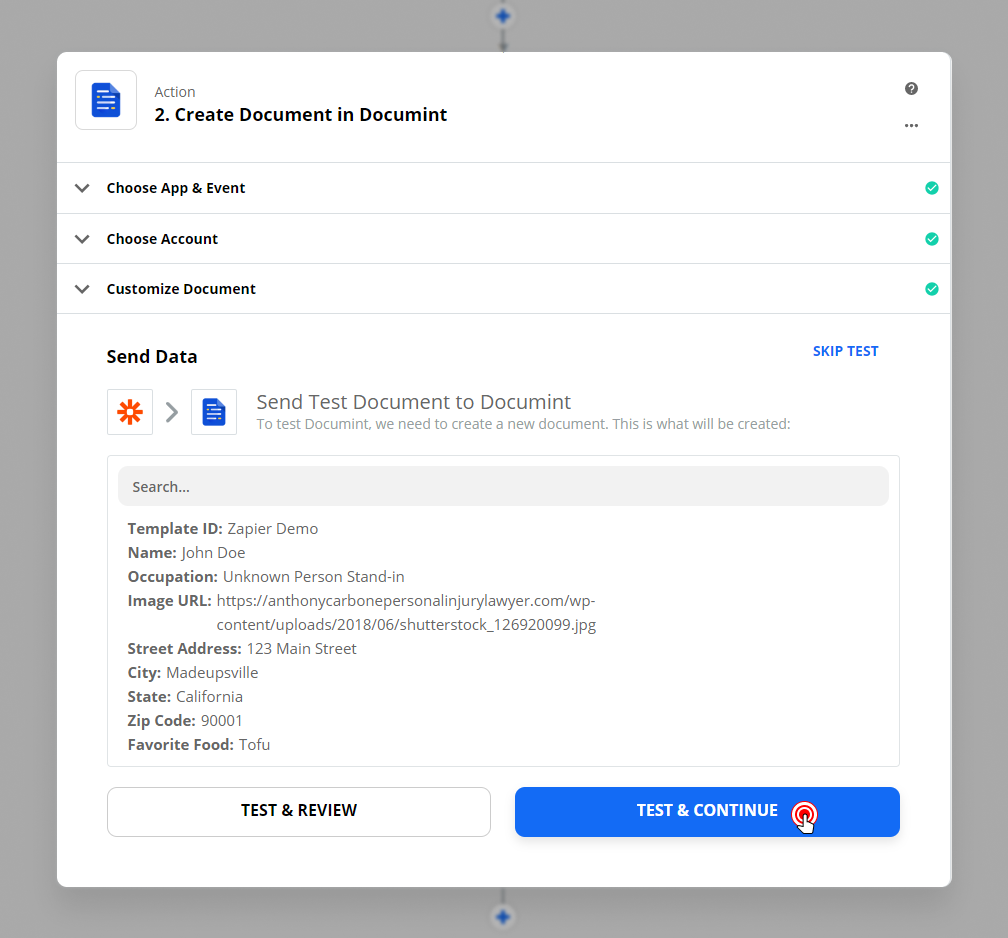
9. Click “TEST & CONTINUE”. This will, if there were responses loaded from the form, merge the selected response with the selected template.
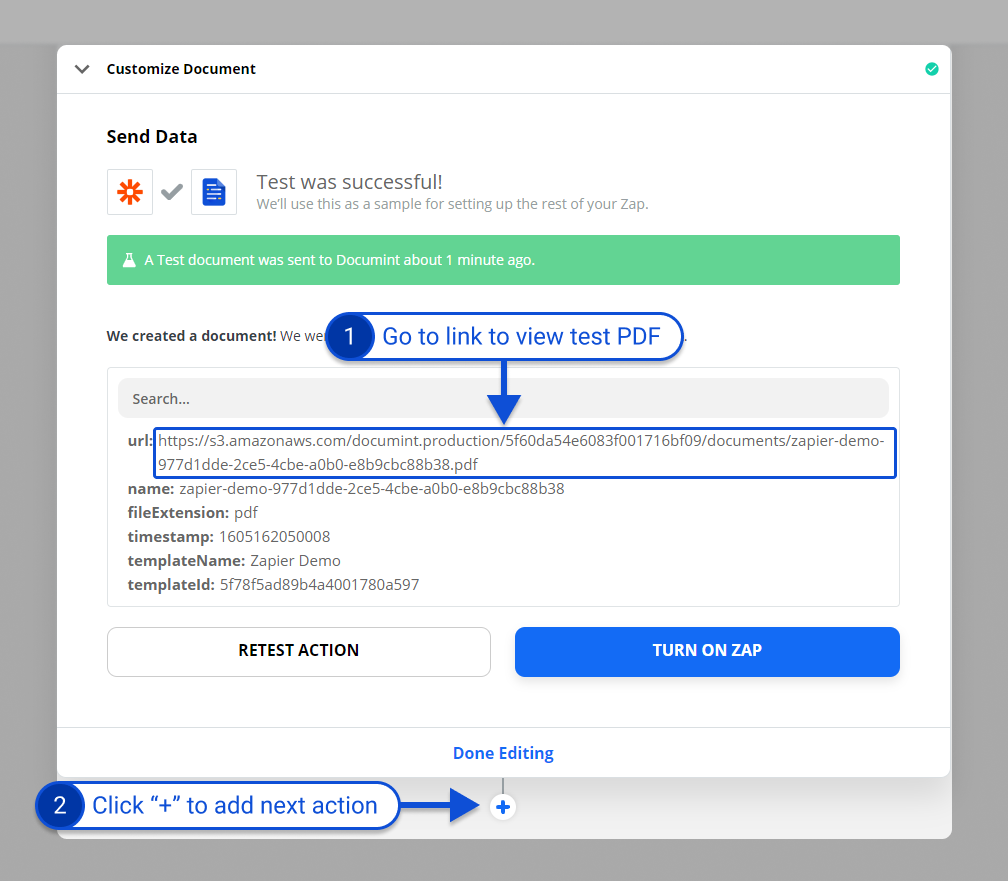
10. You can review the merged test document by following the URL in the response. Click “+” to create the next action.
Choose the action - Store the document
IMPORTANT - The URL link from the Documint step will expire after 24 hours so it's ESSENTIAL that you save the PDF to a storage location like Google drive
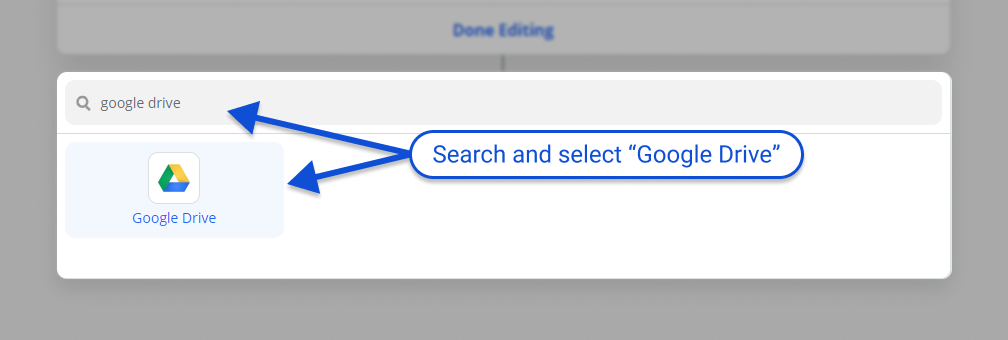
Search for and select “Google Drive”
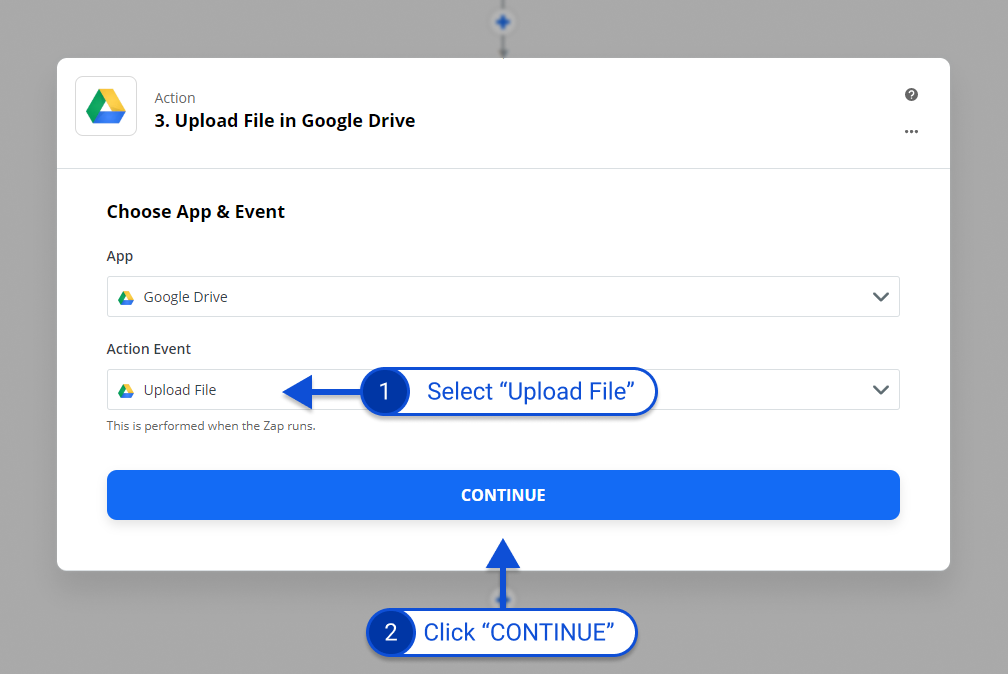
2. Select “Upload File” as the Action Event
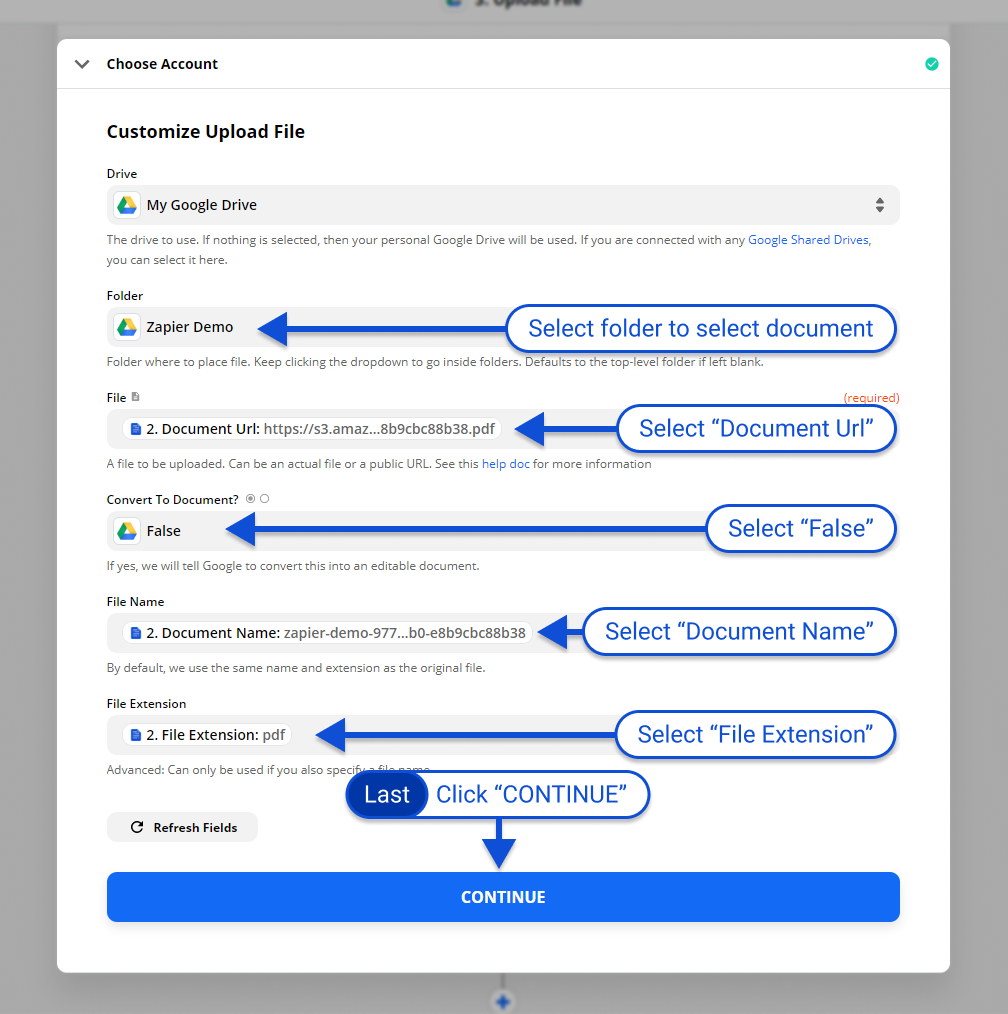
3. Select the folder where you would like to store the generated documents, “Document Url” for the File, “False” for Convert to Document, “Document Name” for File Name, and “File Extension” for File Extension then click “CONTINUE”.
4. Click “TEST & CONTINUE” to test this action and store the newly created document in Google Drive.
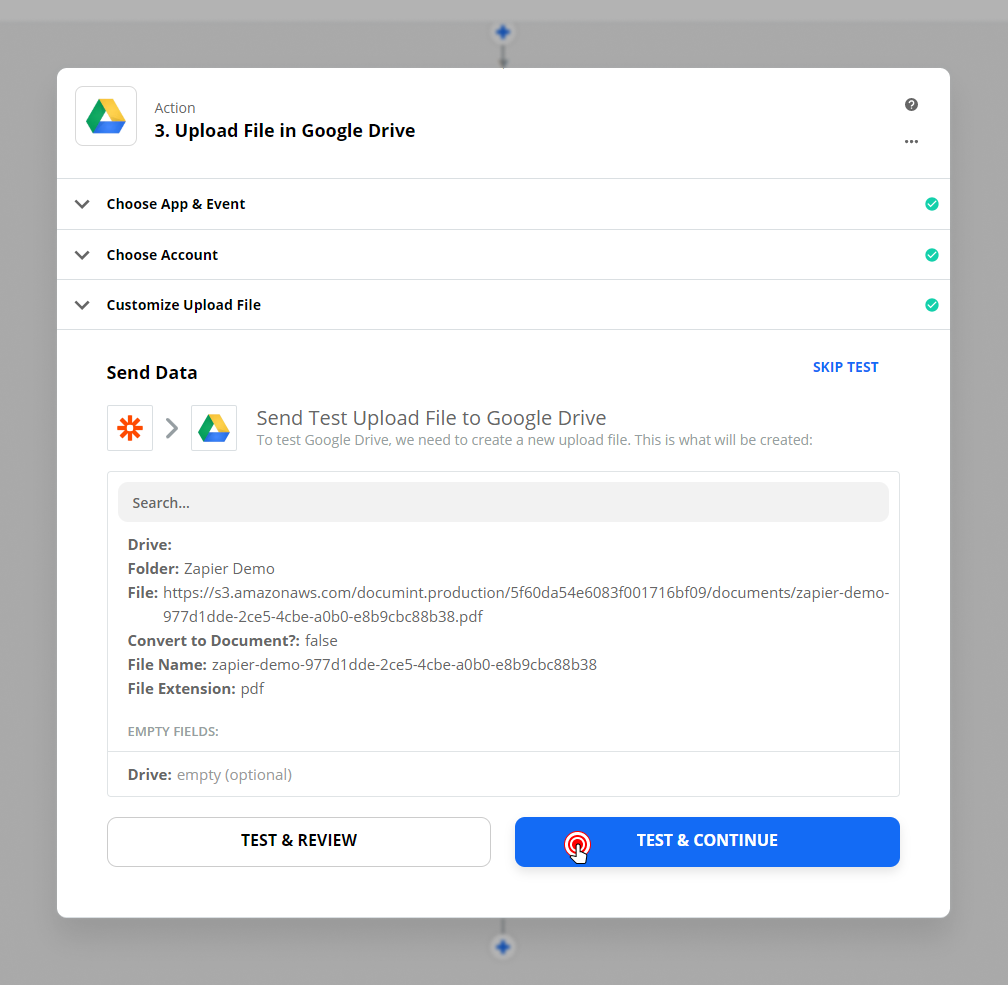
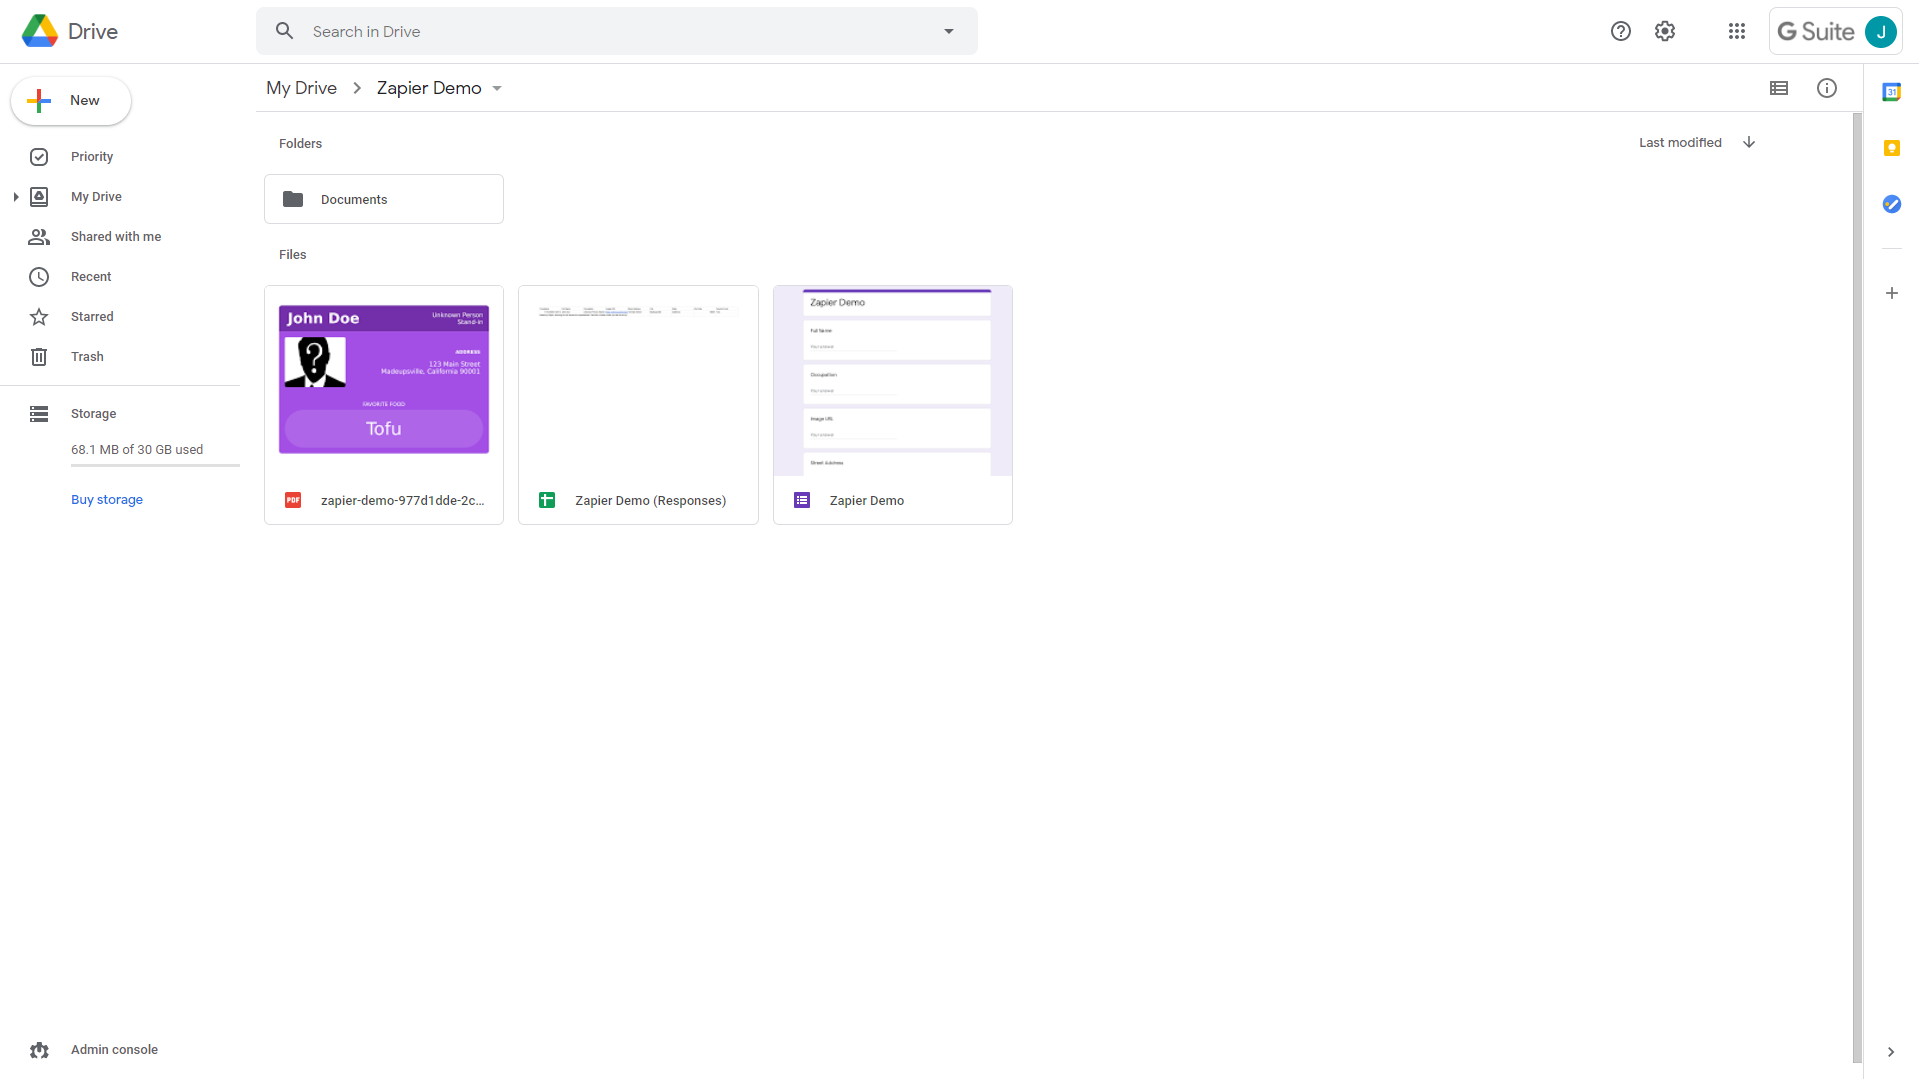
5. Confirm the document was stored in the correct folder
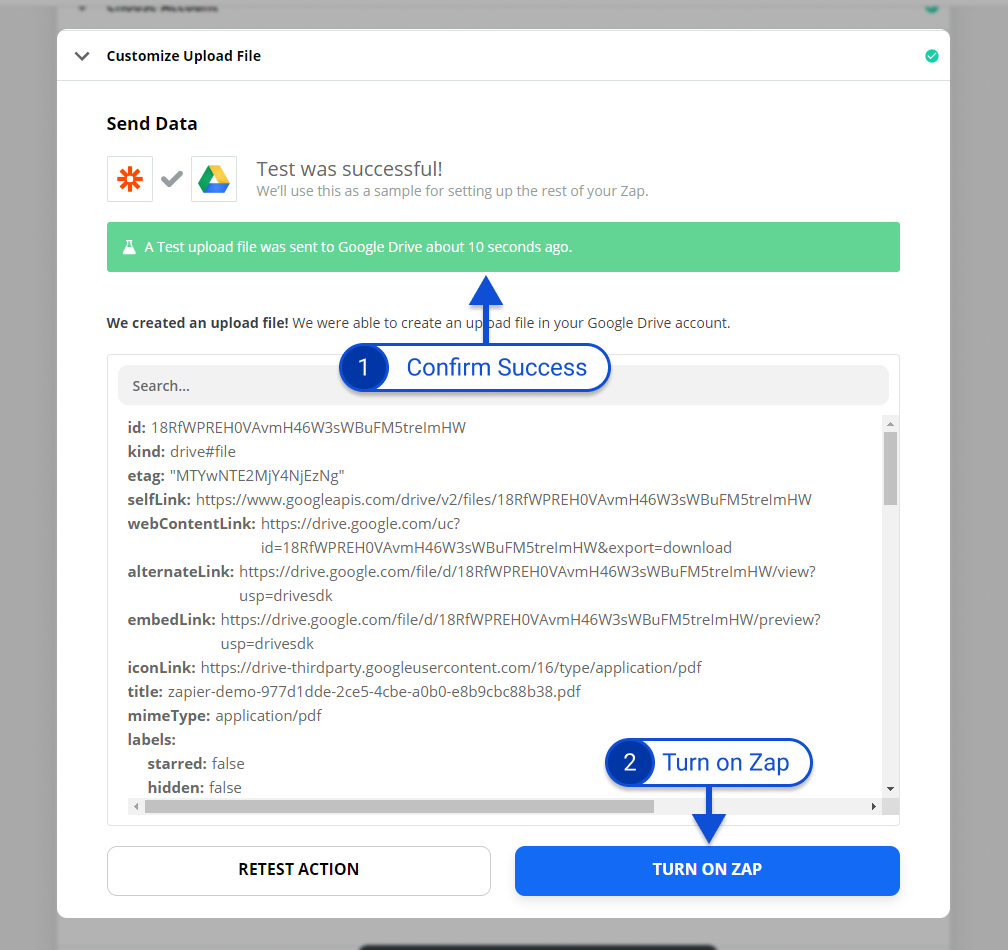
6. When the test completes, click “TURN ON ZAP”
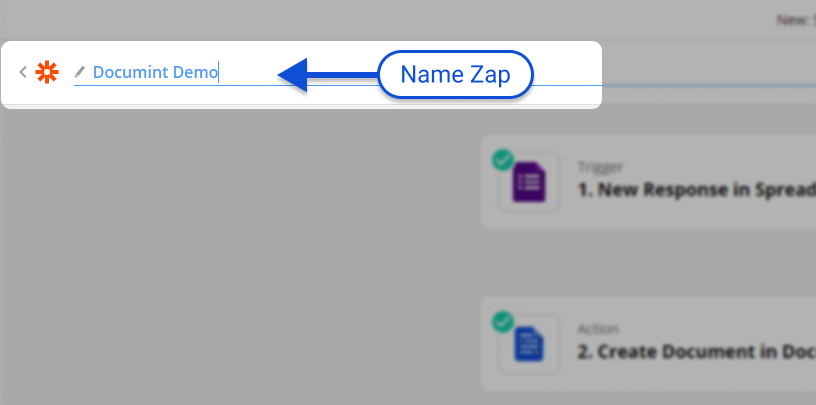
7. Give your zap a name
Setup Complete!
Now anytime there is a new form response, a document will be created from the response and stored in Google Drive.
Last updated
Was this helpful?
